
Hiking on a budget
Hiking is one of the best ways to explore the outdoors, and the nicest part is that it can be done on nearly any budget. You really don’t have to spend a fortune to enjoy miles of scenic trails, fresh air, and a sense of adventure. Over the years, I’ve found that a thoughtful approach to gear and planning can help keep costs low without giving up comfort or safety. Below, I’ll share what I’ve learned about hiking on a budget, including tips, common questions, and choices you’ll need to consider when picking out budget-friendly hiking gear.
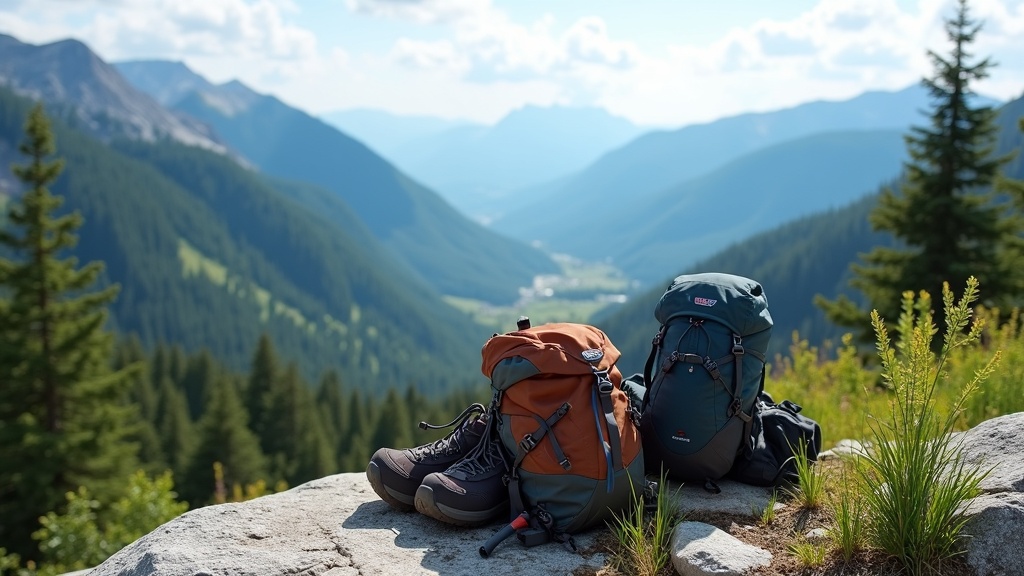
Budget Hiking Basics: Setting Priorities
Heading out into the hills doesn’t mean you need all the latest gear. What really matters is prioritizing the right essentials. Experience has taught me that the most important place to spend your money is on footwear. Shoes or boots that fit well and support your feet will go further toward making your hike enjoyable than any other single piece of equipment.
If you’re just starting out with day hikes on well maintained trails, you can often get by with athletic shoes you already own. However, if you have some room in your budget, it’s smart to choose hiking boots or shoes designed for your terrain. Waterproofing comes in handy for muddy or wet trails, while breathability helps a lot in warmer conditions to keep your feet from overheating. Look for shoes that combine these two properties. A good fit can prevent hot spots and blisters over long distances, and proper soles help with stability on rocky or rough ground.
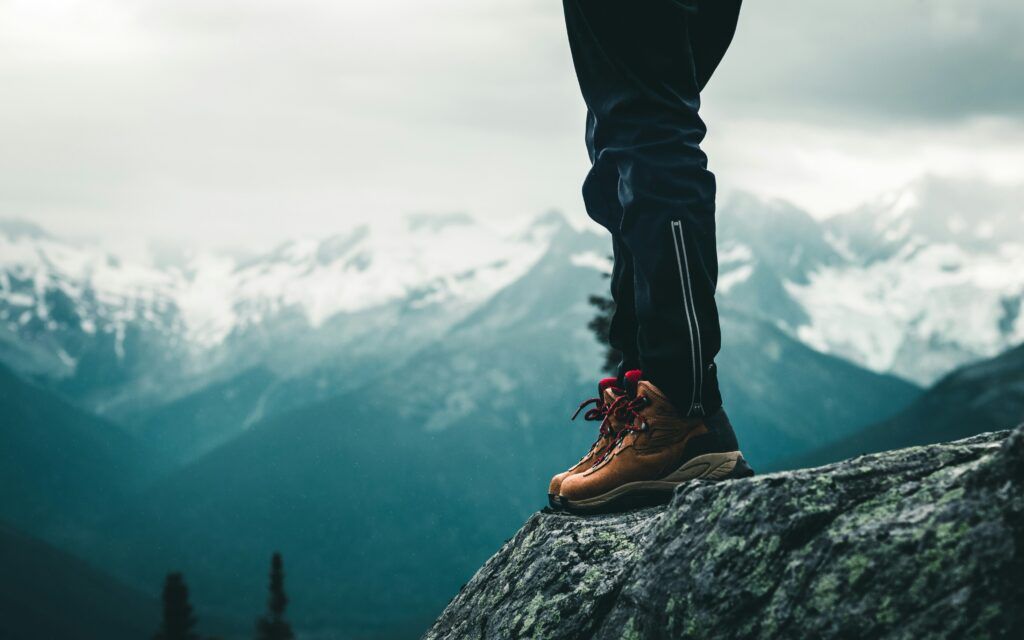
Photo by Ali Kazal on Unsplash
Clothing that Works in Different Conditions
Layering is my go-to method for dressing on hikes, especially as weather can change quickly. This doesn’t mean rushing out to buy all new clothes. I build my hiking outfits around three types of layers:
- Base Layer: These are the clothes directly against your skin. Instead of cotton, I choose moisture wicking fabrics because they keep me drier when I sweat.
- Mid Layer: For warmth, I like lightweight fleeces or insulated jackets that trap heat while staying breathable.
- Outer Layer: A packable rain jacket and waterproof trousers are super helpful for sudden showers, and they don’t have to be fancy to be effective. Protecting yourself from wind and rain can make a big difference in your comfort.
Many of my favorite hiking clothes do double duty in other seasons. For example, a fleece I use for summer evenings works perfectly as a winter mid-layer. If you’re putting together a kit, start with what you own and then add items as needed. Look for multipurpose pieces and consider second-hand or outlet stores to stretch your money further. When it’s cold, I also throw in a hat and gloves appropriate for the temperature; nothing ruins a hike faster than chilly fingers or ears.
Paying attention to your local climate is key. In places where the weather shifts from warm afternoons to crisp evenings, simply adding a lightweight windbreaker to your setup is often enough. For hikers in rainy climates, inexpensive rain ponchos are simple and effective, and they can often double up as ground sheets if you need to sit and rest. I’ve also repurposed sportswear and gym layers—think running tights as a base or football jerseys for wicking—when building my hiking wardrobe on a shoestring.
Choosing the Right Socks and Accessories
Hiking socks may seem minor, but after years of walking on rough trails, I never underestimate them. Regular cotton socks soak up sweat and stay damp, which can cause blisters. I find that socks built specifically for hiking, made of wool blends or synthetic fibers, work much better. They help expel moisture and provide extra cushioning in pressure zones. For me, spending a bit more on good socks has always paid off far more than grabbing another t-shirt or accessory.
Besides socks, a sun hat or beanie is worth bringing, chosen for the weather you expect. Sunglasses, sunscreen, and insect spray are other small but useful extras, and these can be found affordably at many stores. Even on a tight budget, adding these basics goes a long way toward keeping you happy and healthy on the trail.
Don’t forget a large bandana or scarf. It can shade your neck, serve as a towel, or even help out as an emergency sling. Many of these small accessories are often found at thrift stores or even in your own wardrobe. I always toss in a lightweight reusable water bottle—hydration is critical, and this is an easy spot to save money.
Where to Save and When to Spend: Budget Brands and Second-hand Gear
I’ve tried both high-end and budget-friendly outdoor brands over the years. Sometimes the price difference comes down to durability and clever features, but not always. There are plenty of budget brands with solid reputations for reliable, simple gear. Popular options include Decathlon’s Quechua line is a good entry level option. Online reviews and word-of-mouth have helped me spot which items perform well without breaking the bank.
Shopping second-hand is a smart way to upgrade gear without paying full price. I’ve found barely used hiking boots at local charity stores and scored jackets at online marketplaces like Facebook. Many outdoor stores also have outlet sections or seasonal sales. When I choose used gear, I look over it closely for signs of wear, especially seams, zippers, and waterproof coatings. Even if you only pick up a couple of pieces this way, it can free up some of your budget to spend on higher-priority essentials.
Another tip: Check local online communities and social media groups. People often pass on gear they’ve outgrown or no longer use, sometimes for nothing. Don’t overlook renting equipment if you want to try out camping or backpacking before investing. Rentals let you experiment and learn what works for you without shelling out cash up front.
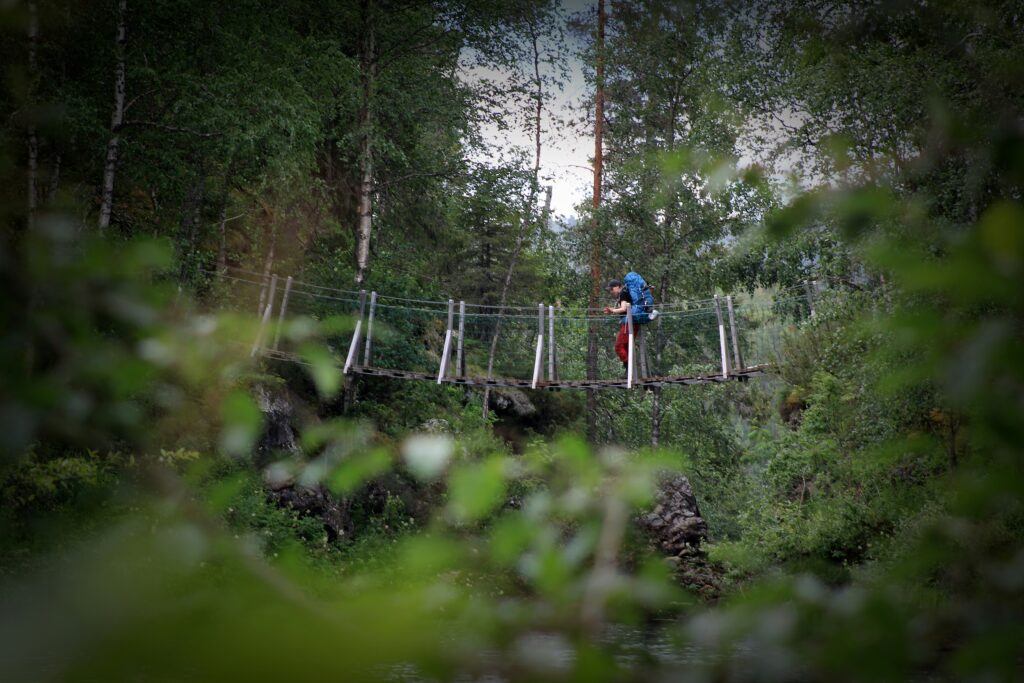
Photo by Anne Nygård on Unsplash
Durability, Weight, and Packability: Making the Right Trade-Offs
I always weigh the balance between buying something cheap versus spending a little more for durability. There’s not a single best approach; it depends on how often you plan to hike and what feels comfortable for you. Sometimes, the lowest-priced item wears out quickly, while spending just a bit more gets a product that lasts for years. Weight and packability matter too, especially if you’re looking at longer day hikes or overnight trips. Lighter and more compact gear is easier to carry, but those features can add to the cost. I decide which upgrades to prioritise and make changes slowly, starting with the basics and adding new gear as my experience and needs grow.
I keep a checklist of items I’d like to improve, marking what worked and what didn’t after each trip. Over time, I’ve found that spending slightly more on my backpack made a huge difference in comfort for longer hikes, while cheaping out on rain gear wasn’t worth the savings. Learning where to draw the line on quality is a personal thing and comes with a bit of trial and error. Don’t feel pressure to buy the latest gadgets—classic, simple gear often endures better and costs less.
Building Your Kit: Essentials First, Upgrades Later
When putting together a hiking kit, I recommend focusing on these essentials first:
- Comfortable, well-fitting footwear suitable for the trails you plan to hike
- Layered clothing made from moisture wicking, weather appropriate materials
- Hiking socks (at least two pairs for longer trips)
- Hat and gloves adjusted for the conditions
- Rain jacket (packable if possible)
- Small backpack for snacks, water, and spare layers
If you have a bit more to spend over time, consider upgrading your pack, adding trekking poles for rough terrain, or splurging on gear that helps you stretch your hiking season, like insulated jackets or waterproof pants. I build my kit by prioritizing comfort and protection, then looking for extra features only if I know I’ll use them often.
Over time, you may want to add a small first aid kit, basic navigation tools (such as a map and compass or a reliable app), and compact snacks for energy. As you get used to packing light and efficiently, you’ll figure out your preferences and gradually fine tune your setup to suit your favorite hikes. If overnight hiking is your goal, add a simple sleeping bag and sleeping pad to your wishlist, but remember—your starter kit doesn’t have to be fancy.
Quick Guide: Hiking Comfortably on a Budget
I break down my approach to hiking on a budget into a straightforward checklist:
- Start with the Shoes: Give your feet the support they deserve. Try on different pairs to find what fits best and suits your local trail conditions.
- Build Layers from the Inside Out: Use moisture wicking base layers, warm but light midlayers, and a basic waterproof jacket and pants. Add as your budget allows.
- Look for Deals and Secondhand Options: Shop end of season sales, check out local thrift shops, and ask friends if they have spare gear.
- Upgrade Over Time: Focus on one improvement at a time based on what you notice on your hikes; maybe it’s better rain gear, a lighter backpack, or hiking poles.
- Keep Your Kit Simple: Carry only what you need and what you know you’ll use. Fewer, more versatile pieces always work better than a cluttered bag of extra stuff.
Besides these tips, always pack a few extras like snacks, your phone or a map, and some extra sunscreen. Little touches go a long way toward keeping your hikes pleasant and stress free.

Photo by Art of Hoping on Unsplash
Frequently Asked Questions: Hiking on a Budget
Choosing affordable hiking gear often brings up a few questions. Here are some I hear most often:
Question: What’s the single most important item to spend money on for beginner hikers?
Answer: In my experience, footwear is the best investment. A pair of comfortable, well-fitting hiking boots or shoes keeps your feet pain free, which is really important on long hikes.
Question: Can I hike in standard gym clothes and shoes?
Answer: For short, well maintained trails in good weather, yes. Just be watchful for blisters and overheating. Once you start hiking more frequently or in tougher conditions, it’s worth upgrading to hiking-specific clothing that handles moisture and weather better.
Question: Should I always pick waterproof shoes over breathable ones?
Answer: Not always. For hot, dry trails, breathable shoes might actually keep you more comfortable. If you often hike in wet or muddy places, waterproof shoes are a better bet. I sometimes carry a second pair of lightweight shoes for changing conditions.
Question: Where can I find reputable but affordable hiking gear?
Answer: I’ve had good luck with outlet stores, online used gear shops, and even local community forums. Brands like Decathlon or Mountain Warehouse often offer budget lines with plenty of positive reviews. Checking for online guides and recommendations from other hikers has helped me avoid low quality gear.
Question: Is more expensive gear always a better choice?
Answer: Not necessarily. Sometimes a higher price reflects durability or advanced features, but I check if those features matter for my style of hiking. Often, midrange or budget items provide everything I need, especially at the beginning.
Making the Most of Hiking on a Budget
Getting started with hiking doesn’t require a big investment. I’ve seen plenty of beautiful places with basic, budget-friendly gear. What matters most is focusing on comfort and safety first, paying special attention to footwear and clothing that works for your conditions. The rest can be added or upgraded gradually as you get more time on the trails. With smart planning, buying secondhand, and prioritizing essentials, hiking can remain an affordable and rewarding way to stay active and enjoy nature year round. Jumpstart your next hiking adventure—with a little resourcefulness, the outdoors is truly open to everyone.
Leave a Reply