
What to wear on a hike – general advice
Figuring out what to wear on a hike can be darn tricky, especially if you’re facing changing weather or heading into new terrain. That’s where layering really comes in handy. Once you’ve got the basics nailed you’ll be able to adjust on the fly and stay comfortable, whether you’re climbing a breezy ridge or moving through a sun-dappled forest. I want to share how layering actually works out on the trail, plus some tips to save you headaches and keep you enjoying your hike.
Why layering matters for hikers
Layering isn’t just an outdoor “hack”. It’s a system people have relied on for years because it genuinely works. Really, it does. Weather can change quickly out on the trail, even if the forecast says blue skies. When you know how to layer, (I’ve been hillwalking for over 30 years) you can peel off a jacket if you’re overheating or throw one on when a breeze picks up. I’ve learned it’s all about being as prepared as possible without having to pack a huge bag.
Heat, cold, wind, and rain all affect how comfortable you’ll feel. It doesn’t take much, one chilly breeze or a sudden downpour, to turn a fun hike into a rough one if you’re not dressed right. So, knowing how to build your hiking kit with good layers really makes a difference for everything from a casual afternoon walk to long, multiday treks. Layering also gives you more control over your comfort without relying solely on your pack or timing, which means fewer chances of miserable hikes as the weather swings.
Layering explained
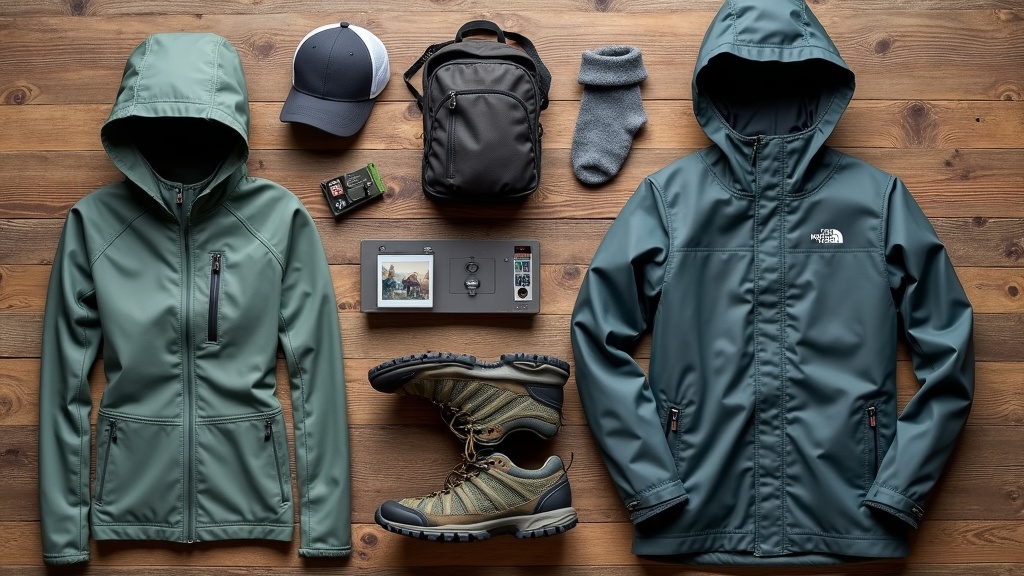
The “layering system” usually means three main layers: base, middle (or insulating), and outer (or shell). Picking the right type for each layer helps you regulate your body temperature, manage sweat, and protect yourself from the elements. Here’s what I look for in each piece:
- Base Layer: Wicks sweat away and keeps your skin dry.
- Mid Layer: Keeps in warmth. Think fleece or a light puffy jacket.
- Outer Layer: Shields you from wind, rain, and snow.
Mix and match these depending on the weather and how hard you plan to hike. Sometimes you’ll only need a couple of layers; other days, it pays off to have all three ready to go. This versatility is why so many experienced hikers swear by this approach, and it can mean the difference between an enjoyable trek and a long, uncomfortable trudge.
Building your hiking layers
When I’m picking my hiking outfit, I always think about comfort and flexibility. No one likes sweating through their shirt or getting soaked and cold when a rainstorm rolls in. Here’s how the three-layer system breaks down for me every time I hit the trail:
Base layer: start with comfort
The base layer sits right against your skin. It’s there to pull sweat away so you stay dry, even when you’re working up a sweat hiking uphill. Synthetics like polyester blends and natural fibers like merino wool are my go-tos here. Cotton isn’t great for hiking since it holds onto moisture and dries slowly, which can make you chilly.
- Cool Weather: Long sleeve merino wool or synthetic shirts work really well.
- Warm Weather: Short sleeve or sleeveless base layers help with temperature and sweat control.
Bonus tip: Plenty of hiking socks made from merino wool also double as awesome base layers for your feet. Dry feet matter just as much as a dry shirt, so never neglect your sock choices.
Mid layer: trap the warmth
The middle layer, also called the insulating layer, traps heat. You’ll want something that keeps you warm but isn’t super bulky. Fleece jackets or pullovers, light insulated jackets, or even a down vest work great. You’ll often take this layer off and stash it in your pack when you start heating up, so pick something lightweight and easy to pack away.
- Fleece Tops or Lightweight Puffies: Keep in body heat while letting moisture escape.
- For Legs: If it’s cold, fleece or heavier tights can act as mid layers under hiking pants.
Synthetic insulation is handy if you expect wet conditions. Down insulates really well but needs to stay dry, since it loses warmth if soaked. When in doubt, synthetic options are easier to maintain, and they hold up better to rough use out on the trail.
Outer layer: shield from the elements
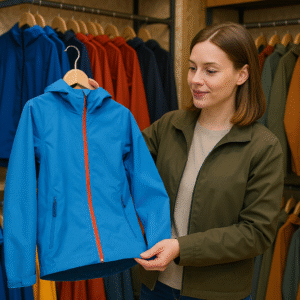
The last layer, your shell, protects you from wind, rain, and snow. This isn’t always a super heavy-duty jacket. Sometimes it’s just a thin windbreaker. Here’s what I check for:
- Waterproof/Breathable Jackets: Look for Gore-Tex or similar materials for steady rain or rough storms.
- Windbreakers or Rain Shells: Lighter, more packable options if you’re expecting wind or light rain.
- Rain Pants: Super useful if you’ll be hiking in sustained wet weather or tall, wet grass.
Good quality rain gear makes a big difference. Even if you stuff it in your backpack and don’t use it, having that backup is super important for peace of mind and comfort. Sometimes, a simple compact rain poncho or wind shell is enough for most trips, but for alpine hikes or unpredictable climates, I always recommend packing the best shell you can afford.
Common mistakes (and easy fixes)
Most common mistakes I see come down to either wearing too much, not enough, or picking the wrong fabrics. Here’s what I’ve learned works best to avoid the headache:
- Skipping the Base Layer: Without a moisture-wicking layer, sweat just stays on your skin, leaving you cold or chafed. Even in mild weather, a lightweight base layer is worth it.
- Wearing Cotton: Cotton feels comfy at home but hangs onto sweat and rain, making you clammy and cold. Save cotton for the cabin or drive home.
- Bulky Layers: Overpacking heavy layers sounds smart, but it can make your pack heavy fast. Modern hiking clothes are light and pack smaller without losing warmth.
- Forgetting Accessories: Hats, gloves, and buffs can really save the day when conditions switch up quickly. I always throw a light beanie and some gloves in my pack, even if it seems warm.
Another pitfall to watch for is ignoring local climate quirks if you’re hiking somewhere new. Sometimes humidity or wind chill changes the game compared to what a simple forecast might tell you. Trust your gut, but don’t ignore tried and tested experience from local hikers.
Layering checklist: what to pack for your walk
I’ve found it handy to run through a layer checklist before I zip up my pack. Tailor it for the weather, but this is a solid place to start:
- Base layer top (long or short sleeve)
- Base layer bottoms (for colder hikes)
- Insulating mid layer (fleece, vest, or light down/synthetic jacket)
- Waterproof shell jacket
- Breathable hiking pants or shorts
- Rain pants (if rain is likely)
- Wool or synthetic hiking socks
- Lightweight gloves and beanie
- Buff, neck gaiter, or sun hat
For longer hikes or cooler months, I sometimes add a thicker puffy jacket while I’m standing around camp. Always plan for the worst case. Ask yourself, “What if it’s windier or colder than I expect?” Taking ten seconds to run through this list reduces your odds of getting caught uncomfortable by surprise weather.
Advance tips
If you want to fine-tune your system even more, here’s a bit of what’s worked really well for me over time:
Choose Zippered Layers: Half-zips or full zippers on base and mid layers make dumping heat much easier without having to take everything off.
Look for Packability: Jackets and fleeces that squish down small keep your bag lighter and your load less tiring over long distances.
Double Up on Small Items: An extra pair of dry socks or a spare buff hardly takes any space, but can make a huge difference if your originals get wet.
Wear Gaiters: If you know you’ll be walking through snow or mud, throw on some simple gaiters to keep stuff out of your boots and your lower pants dry.
Don’t Forget Sun and Bug Protection: In summer or humid areas, superlight shirts with sleeves and airy hats are worth their weight in gold. Consider a breathable, loose layer for midday sun exposure, and look for fabrics with built-in bug repellency when the season calls for it.
FAQs
I get questions about hiking clothes a lot, so here are a few quick answers to things beginner hikers often wonder about.
Question: How many layers should I actually wear at once?
Answer: It depends on the conditions and your body. Start with all three layers in cooler weather, and shed mid/outer layers as you warm up. Always keep your shell handy even on warmer days just in case. Remember, it’s always better to have one extra layer than to wish you’d packed it when the weather turns.
Question: Can I wear regular athletic clothes for hiking?
Answer: Many gym clothes made of polyester or nylon wick sweat pretty well, but watch out for anything made from cotton. Technical hiking clothes usually handle abrasion and weather better, and small design details like thumbholes or drop-tail hems can make a difference on longer hikes.
Question: What’s best for changing weather, especially in mountain hikes?
Answer: Always bring your shell and a warm garment like a light puffy or fleece, even if it seems nice when you leave the car. Mountains can surprise you with quick storms or wind. Staying alert and ready to add or drop layers keeps you safer and more comfortable.
The bottom line: hiking layering for real-world comfort
When I started out, I definitely bought some stuff I didn’t actually need and ignored a few items I really should have packed. Learning what works for your climate, your schedule, and your body takes some practice, but the classic three-layer system doesn’t let you down. Stick with solid base layers, choose packable mid and outer layers, and don’t forget the good socks. Being prepared isn’t about packing the most; it’s about packing the smartest.
Enjoy your next hike and see how much better it feels with the right layers along for the adventure!
(For advice on what to eat when out on the trail, click on this link to my other page.)
Leave a Reply