Safety and first aid in the mountains
In this article, I’m sharing outdoor safety and first aid advice—everything based on my personal experiences and research. You’ll see what I pack, how I handle injuries, and what I do to reduce risks when I’m outdoors.
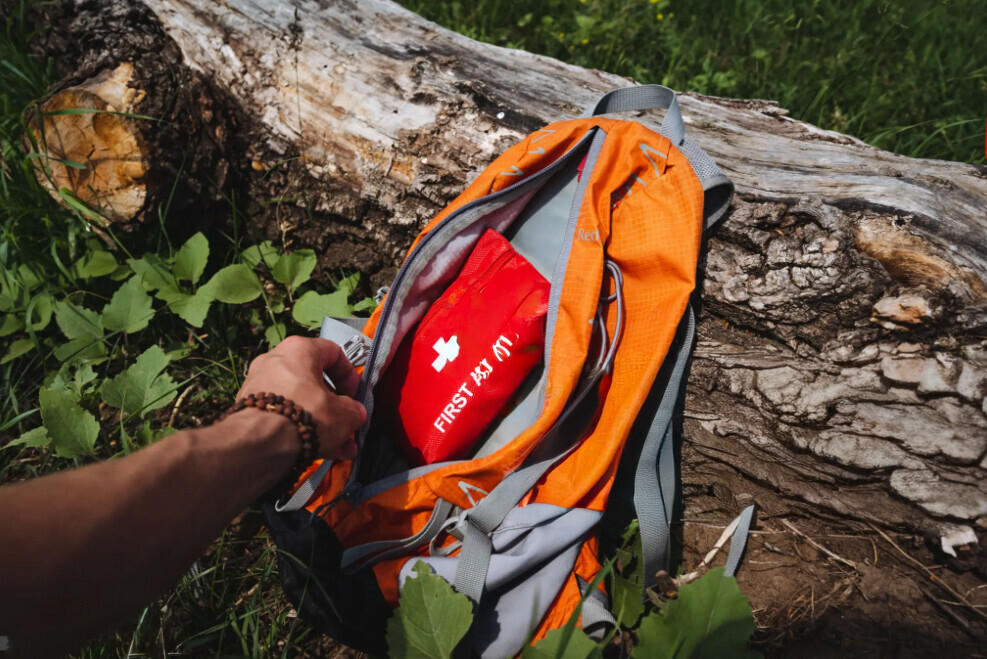
Building a reliable outdoor first aid kit
Firstly, I used to be terrible at this. I’d never even pack a plaster back in my younger days. Experience, however, tells me now that a first aid kit is something I never leave behind. Having one that’s packed well means I can handle anything from a scrape to a sprained ankle. Over time, I’ve built and improved my kit to cover common outdoor injuries. Here are the essentials I suggest anyone should pack before heading out:
- Plasters, blister plasters, and bandages: Regular plasters work for small cuts while blister plasters have saved my feet on long hikes. Good bandages help with bigger scrapes or for holding gauze in place.
- Antiseptic wipes and ointment: Cleaning any wound right away helps prevent infection; something extra important if I’m days away from a pharmacy or hospital.
- Pain relief (paracetamol or ibuprofen): I bring pain relievers to handle headaches, muscle aches, or to ease swelling after an injury.
- Tweezers and safety pins: Tweezers get splinters and ticks out quickly, and I’ve used safety pins to fix gear or make a temporary sling more than once.
- Small scissors and tape: I use small scissors to cut bandages or moleskin, and medical tape keeps everything secure.
- Personal medication: Always double-check you have essentials like your inhaler, allergy meds, or EpiPen, and bring extras for the group in case someone forgets theirs.
You can adjust your kit for your trip, but covering these basics gives real confidence no matter the adventure. If I’m heading on a longer remote trip with a camp-fire, I’ll add burn cream, and an emergency blanket. The Red Cross has detailed outdoor first aid kit checklist for more ideas (Red Cross First Aid Kit List).
I also like to carry a few extras like a whistle, compact mirror for signaling (no, really!), and a small notepad to jot down anything important.
Common outdoor injuries and how I manage them
Even with lots of preparation, things can go sideways. Over time, I’ve learned to spot and treat the most common injuries quickly, so problems don’t pile up on the trail. Here’s my plan:
- Blisters: When I feel a hot spot on my foot, I stop immediately, put on a blister plaster or some moleskin, and adjust my socks. Covering the spot early saves me a lot of pain for the miles ahead.
- Sprains and strains: If I twist an ankle, I rest, chill it with a cold water bottle if possible, wrap it with a bandage, and try to keep it up. If it’s really sore, I take it slow and consider if I need to cut my trip short to get home safely.
- Minor cuts and grazes: Cleaning the wound with an antiseptic wipe comes first, and then I stick on a plaster or a gauze pad with tape. Keeping the injury clean is very important outdoors, even if it’s a small cut.
- Insect bites and stings: I bring antihistamines for reactions, use tweezers for ticks, and rely on cooling gel to tame most stings or bites. I try to wear long sleeves and use repellent in buggy spots.
- Hypothermia and heat exhaustion: If someone is cold and shivering, I get them into dry clothes, offer warm drinks, and share body heat. For heat, I find shade, get them to drink, and use wet cloths to cool down. Spotting these conditions early makes a huge difference.
Learning how to act fast and stay calm really helps me keep small issues from getting out of hand.
Navigation and emergency preparation
Getting lost or stuck somewhere is something I always try to avoid. Over the years, I’ve developed a routine to stay safe and know how to get help if things go wrong:
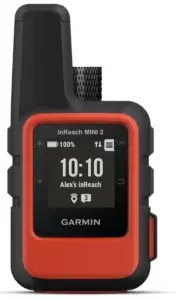
- Carry a map, compass, or GPS: I use my phone’s GPS when I need to (thankfully not often) but I usually pack a paper map and compass in case I run out of battery or lose signal. Practicing with both means I’m never stuck if my phone lets me down.
- Check nearest exit points and escape routes: Before heading out, I look over the map for trail exits and parking spots. If I need to leave quickly, knowing about shortcuts or exits really helps.
- Share the plan: I make sure someone at home knows my route and the time I plan to be back. If I don’t show up, they can raise the alarm and rescuers will know where to look.
- Know how to signal for help: Three whistle blasts is the universal call for help, and I carry a small mirror to catch attention during the day. I’ve also tested smartphone apps like What3words for sharing location when there’s cell service.
Cramming these few items into my bag takes almost no space, but brings massive peace of mind. The AdventureSmart site has more planning tips to keep your outdoor time safe.
For extra prepping, I also pack headlamp batteries, a backup charger, and a small emergency snack stash. These come in handy more often than you’d think, especially if a trip runs longer than expected.
Wildlife and environmental hazards
Being outside a lot, I’ve learned to respect animals and wild places. Here are my go-to strategies for staying safe while still enjoying nature:
- Wildlife encounters: I keep away from deer, sheep, or any wild animal—no close photos. If I bump into a larger animal, I give it space to walk away.
- Avoiding ticks and Lyme Disease: In areas with ticks, I wear long sleeves, use repellent, and give myself a tick check when I get back. If I find one, I use tweezers to pull it out and clean the spot.
- River crossings: Fast moving water is risky, even if it looks shallow. If crossing is needed, I pick the widest, shallowest area and test the depth with a stick. I also unclip my backpack before crossing, just in case I need to ditch it if I fall in.
- Rockfall and Landslides: In mountain areas, I keep an eye out for any loose rocks above trails and avoid walking under cliffs. If the weather is rough or quakes have hit recently, I take extra care or switch routes. The Lake District Mountain Rescue Team in the UK has advice on staying safe in those conditions (LDMRT Safety Tips).
Learning about local critters and terrain is as important as packing the right gear. I always try to read up in advance for extra details or warnings that could affect my trip.
Outdoor first aid FAQs
Whenever I’m prepping for a new adventure, I hear the same questions from friends, especially those new to hiking or camping. Here are a few of the top ones along with what’s worked for me:
What should I do if someone gets seriously hurt and I can’t get help?
If the area is safe, I use my first aid kit to stabilize the injury, stop any bleeding, support any broken pieces, and keep them warm. I try to call emergency services right away if there’s any signal. Staying calm and giving details helps first responders work fast. I also recommend taking a simple outdoor first aid course—they’re packed with info you hope you never need.
How do I avoid dehydration and keep my water safe outside?
I always pack more water than I think I’ll need, drink regularly, and bring either a filter or tablets so I can treat water from streams safely. Keeping hydrated is super important in hot weather or in the mountains, where you lose water quicker but don’t always feel thirsty.
Should I buy a premade first aid kit or put one together myself?
Both are good options. I go for a store-bought outdoor kit and then add extras to fit my needs, like extra pain relievers, specific meds, or extra blister gear. Customizing lets me be ready for what really matters to me and my group.
Why outdoor safety and first aid matter
After years outdoors, I know being ready for risks makes every trip better. When I know what’s in my first aid kit, how to handle common injuries, and ways to get found if I need help, it’s easier to enjoy every hike, ride, or camping trip. Even little things—like checking the hourly weather, packing an extra whistle, or marking a backup exit—make a real difference. If you’re planning to get outside, spend some time prepping these basics. Staying safe lets you enjoy the best parts of being outdoors for years to come. Take it up a notch—make safety part of your adventure and keep nature fun for everyone.